
So—you’ve settled on a trade. Congratulations! Now your task is to get your cards safely to the person on the other end of the screen. If you’re new to trading, or to the United States Postal Service (USPS), this guide should cover everything you need to know!
Disclaimer: This guide is written and only applies to postage within the United States of America. Additionally, this guide was originally written in August of 2024. USPS rules change and so do prices, so although I try to keep things updated, some information may be out of date. As always, I'd advise visiting the postal service website at www.usps.com for the most accurate information. Webpage last updated on: 10-18-2025
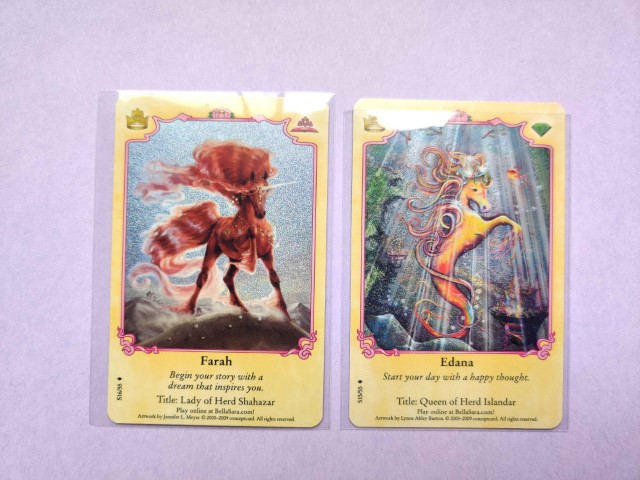
There are many types, shapes, colors, and paper weights available to the modern consumer. Additionally, there are many places where one can procure envelopes (and the card that goes inside): thrift stores, craft stores, the office supply section/store, your grandma’s attic, and so on. For trading, there are no standards for what is/isn't appropriate: some use blank cards, some use cards with patterns, some don’t use cards at (though this is not recommended).
Here are the only rules that you must follow when you want to mail an envelope, per the USPS:
While this sounds like a lot, most envelopes available will fit within these standards. Here are the most common sizes:
Of course, there are many other sizes out there, but as the envelope fits within the requirements of part B it can be mailed!
Footnote 1: Letters weighing more than 1 oz require additional postage. The maximum postage allowed is 3.5 oz; anything over that, the price varies (but you likely will never hit this limit, but if you do look on the USPS website for more information).
Footnote 2: Letters over ¼ of an inch thick do not fit through the mail sorting machine. They are classified as “non-machinable” and thus require additional postage (more on this in the “Stamps” section).
2. Inserts
What goes inside of an envelope? Well, here’s some things I’ve found inside envelopes:
If you’re cost-conscious or simply trying to recycle, saving cereal boxes is a great way to make thick, solid cards that you can cut to size with a ruler and scissors according to whatever envelope you have.
The reason for a piece of paper inside the envelope is for additional protection for the card(s). Letters are sorted through large machines, and can sometimes get a little bent out of shape. This is why simply slipping cards into an envelope is a bad idea: aside from the weather, cards make an envelope bulky and uneven.
This inside piece of paper/card also gives you a place to write a nice note, draw a little picture, and/or attach your card(s) so they don’t float around. Speaking of protecting cards…
3. Types of Card Protection
Card protectors are plastic devices used to keep cards dry and protect from bending or folding. They may be rigid or flexible, and there are many kinds.
Card sleeves as a general category are thin, flexible plastic covers. They are usually purchased in bulk quantities and are relatively cheap. Here are four kinds:
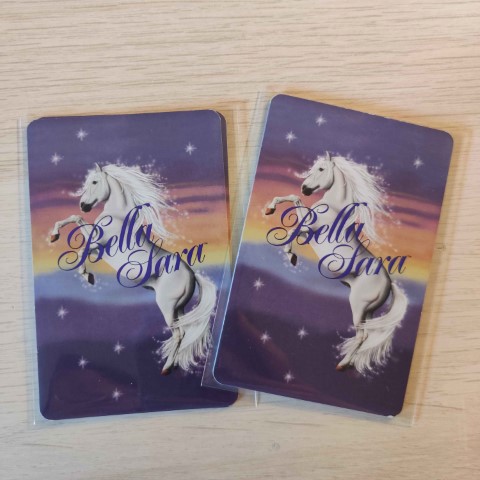
No. 1 and 2 are “Penny Sleeves.” These are thin plastic and are the cheapest you can buy but are essential to card collection in general (more on this soon). However, there is a big difference between these two: their size. No. 1 is 2 ⅝ by 3 ⅝ inches and No. 2 is 2 ½ by 3 ½ inches. That extra one-eighth matters.
See how the left (No. 1) covers the top of the card completely? This is what an ideal penny sleeve should achieve for Bella Sara cards. This size of penny sleeve is marketed towards sports cards collectors, who have (as BeSa collectors do) slightly larger cards than Magic: the Gathering, Pokemon, or Yu-Gi-Oh! The only reputable seller of these is Ultra-Pro.
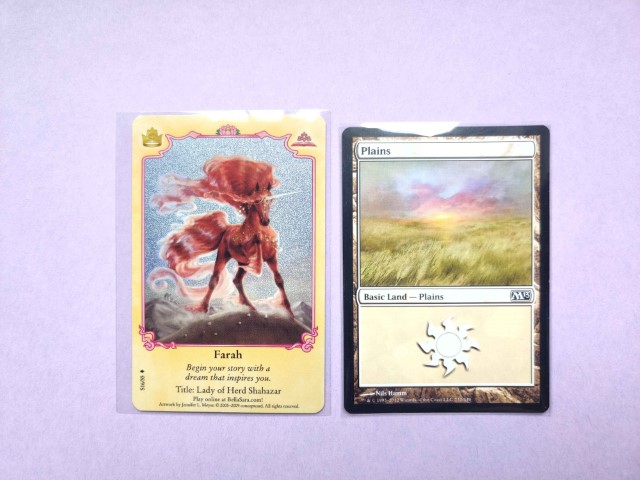
The same Bella Sara card next to a Magic: The Gathering card for reference. The Magic: The Gathering card fits perfectly in the smaller-size sleeve.
For this same reason, avoid purchasing sleeves like No. 4 (below).
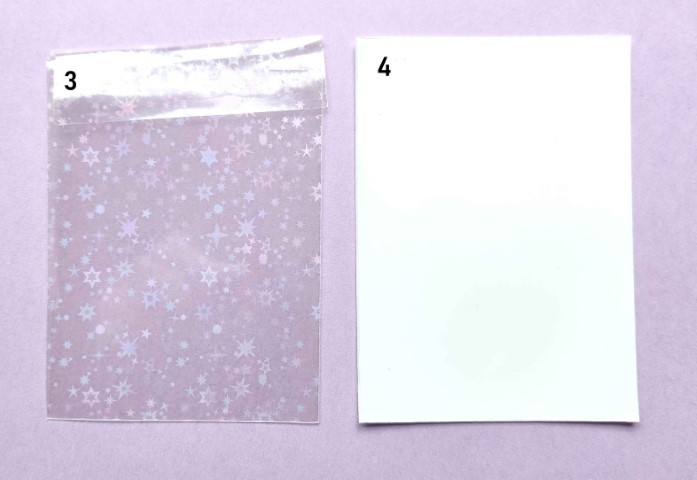
This is a thicker plastic type of penny sleeve often referred to as a “card sleeve.” They come in clear or colored backs (this one is white) which may be textured. They are ideal for cards like Magic: the Gathering or Yu-Gi-Oh! In that the manufacturer expects the purchaser to constantly be handling (read:playing with) their cards, which doesn’t happen often with Bella Sara. If you go to any game store, this will likely be the type they stock. These are usually made by DragonShield or Katana.
For comparison, here is a Bella Sara card and a Magic: The Gathering card in this same type of sleeve:
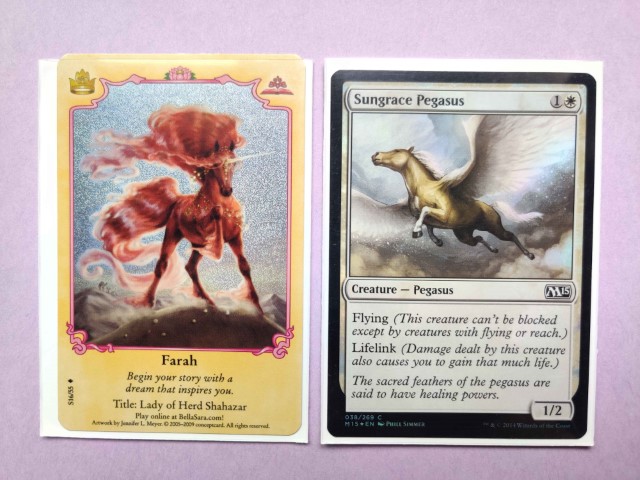
However, in addition to being more expensive (the Ultra-Pro penny sleeve runs about $0.045/sleeve or less if bought in bulk; DragonShield is about $0.13/sleeve and Katana is $0.15/sleeve), they still are not the correct size.
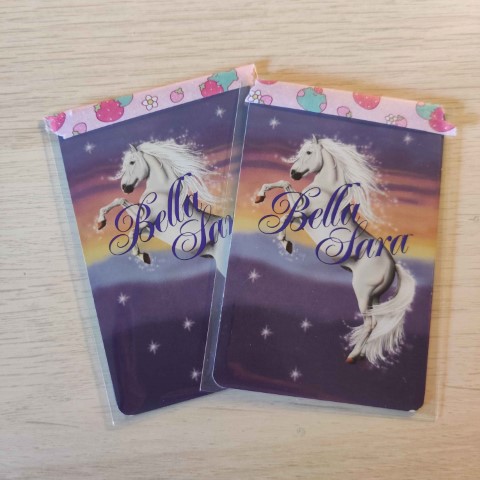
Finally, No. 3 is a holographic, decorative type of sleeve that has a flap at the top (some come without the flap). These are specialty and often sold for K-pop idol cards and the like. The plastic is thicker and they are cute, and they cost about the same as the No. 1 Ultra-Pro sleeves ($0.04/sleeve). They technically fit Bella Sara cards with the flap, but cards can be hard to get in and out of because they stick to the stripe of glue on the flap.
The next step up in terms of protection is a hard sleeve. These are, as the name suggests, a harder plastic that has very little give, while still offering moisture protection like the penny sleeves. It is recommended to have both kinds (to see why, go to section “Package the Cards”).
There are really only two kinds of these sold in the US:
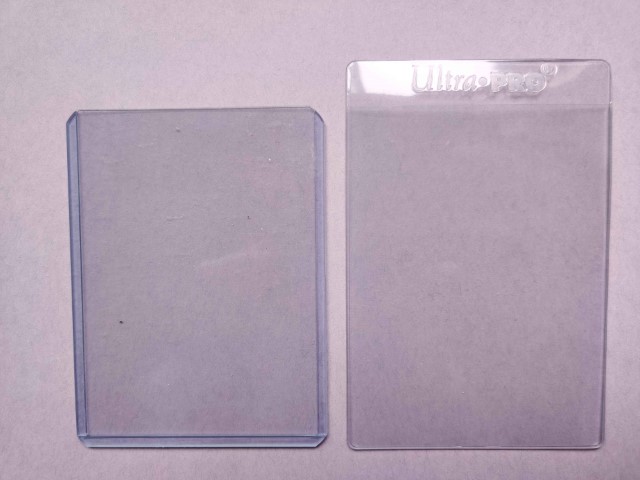
No. 1 is a “Top Loader,” which is the gold standard for mailing cards. This is very rigid. It is also bigger/wider than a card sleeve. A maximum of 4 Bella Sara cards fit (carefully) inside one, or three cards inside of a penny sleeve. A top loader is 1/16 inches thick, so they fit in envelopes nicely. They are a little expensive, at about $0.25/top loader (or less if purchased in bulk.) Chances are frequent trading or purchases means you might end up with some without even needing to buy any!
No. 2 is a “Semi-Rigid Card Holder.” These have a little pocket and extra space at the top. They are about 1/32 inches thick. However, these have a habit of “gripping” any cards put inside them, which can mean a struggle to get the cards out. They are also so wide that cards slip around inside them. They are, however, cheaper than Top Loaders, averaging about $0.19/card holder.
You can also make semi-rigid card holders using thin cardboard or even (if you need to get rid of those Ancient Lights) other Bella Sara cards. They won’t offer much in terms of moisture protection, but they work just fine and are not out of the ordinary. If you’re more concerned about moisture, you can also seal cards in a sandwich bag.
With all supplies in hand, what is the best way to actually mail a card? While everyone has a slightly different method, I’ve gone step-by-step on what I do!
The amount of cards you are sending will determine what size of envelope works best. 1-3 cards will fit in a top loader or card holder. Here again are the most common sizes of envelopes…
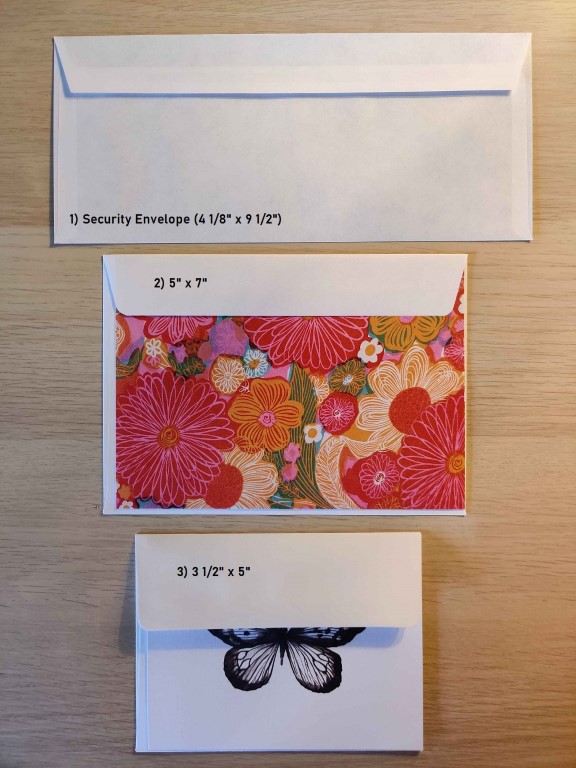
… And how many top loaders they can fit at maximum. So, a 3 ½ by 5 inch envelope is capped at 6 cards, and the other two can both send up to 9 cards.
I personally have never sent cards in security envelopes, but I have received cards from them, so I know they are still effective. The only issue with them is that they contain no insert, so you must make your own in order to put more than one top loader inside (or else the top loaders will stack and shift in the envelope; this will make the envelope thicker than ¼ inch and/or cause the envelope to rip in transport.
For purposes of this demonstration, I will be packing five cards in a 5” by 7” envelope. But all methods remain the same for other sizes.
Since a toploader can fix a maximum of 3 cards, I’ve separated the cards into a group of two and a group of three and put these inside a penny sleeve.
I secure the top using tape, so the cards don’t slip out. Technically, both the penny sleeve step and the taping step is optional, and you could put the cards directly into the toploader and proceed to Step 3. But I like this little extra bit of protection, so I include it.
A note on tape: I’m using washi tape here and in Step 3. I prefer to use washi tape because the adhesive is weaker and much easier to pull off (it’s also cuter). You can also do this part with scotch tape, but I personally don’t as I don’t like having to bring scissors near cards or the hassle of trying to pry up Scotch tape and having all those little teeth hinder me as I peel up strip after strip without getting anywhere… I digress.
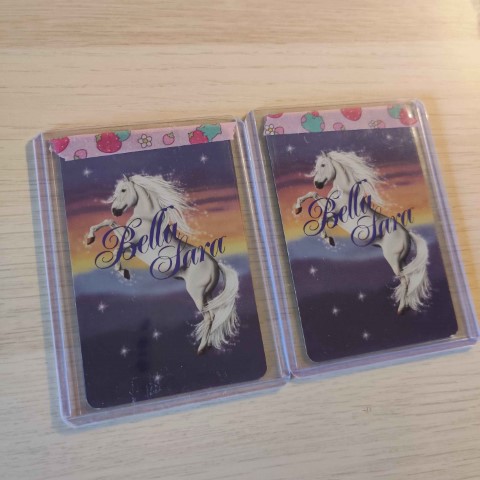
Here are the cards taped:
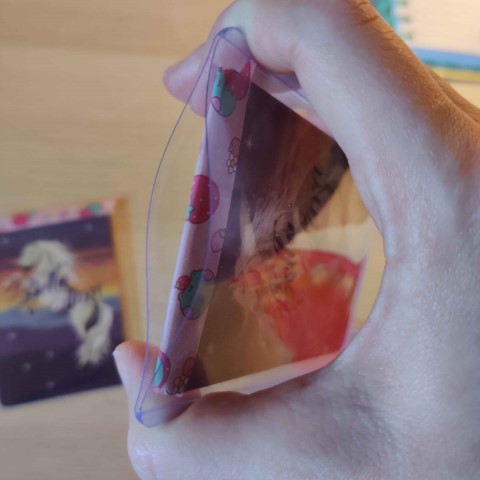
And then we get to put them inside the toploaders. This step might require you (especially if you’ve put more than one card inside the penny sleeve) to bend the toploader to fit the cards inside, as I’m doing here:
Now, they’re both done!
We’re ready to move on to Step 3!
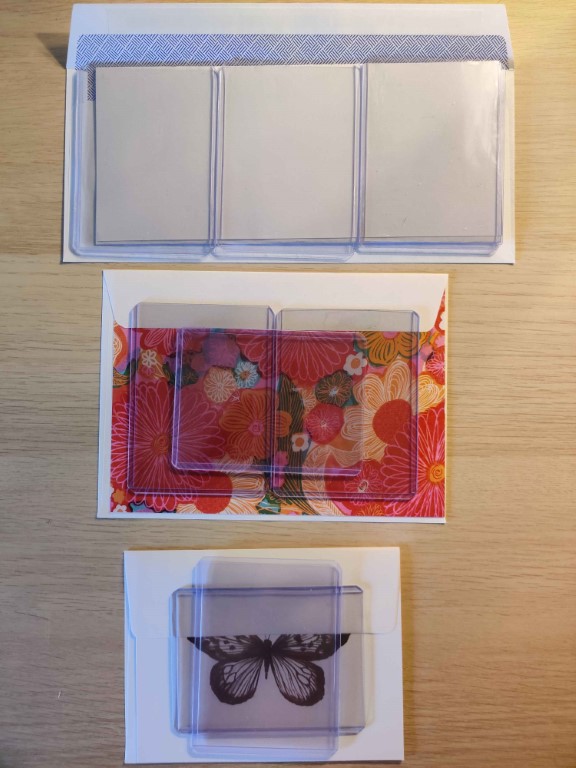
This one is pretty easy. Just line up the toploaders on the inside of the card or insert you’re using:
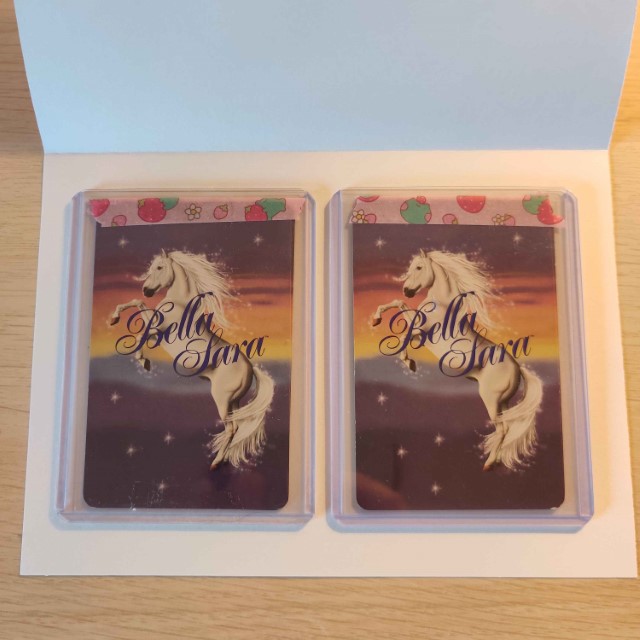
…And tape them there! As I noted before, I use washi tape for this as well, as it doesn’t leave a sticky residue on the top loaders. I also use a lot of tape–you might be able to use a lot less, but I have a lot of washi tape and I like to use up the ugly stuff when I can.
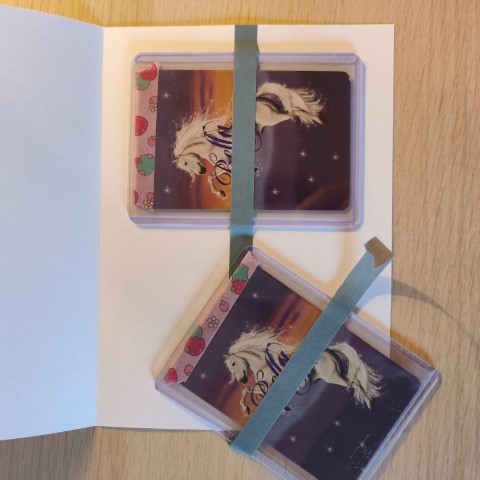
You’ll also notice that I tape one at a time. This is more secure than running one long piece across both top loaders. You could also create a roll of tape by folding it back on itself and use that to stick the top loaders to the card. Or just use double-sided tape! The possibilities are endless, and I’m a big advocate for using what you have on-hand.
Now that you’ve attached the cards, you can write on the other side of the card or include stickers, or just leave it blank. Many traders send stickers as a thank-you, and almost all write a little thank-you inside. A simple “thanks for trading!” is good enough; no need to write a paragraph or two!
You should be left with a rather chunky letter or insert.
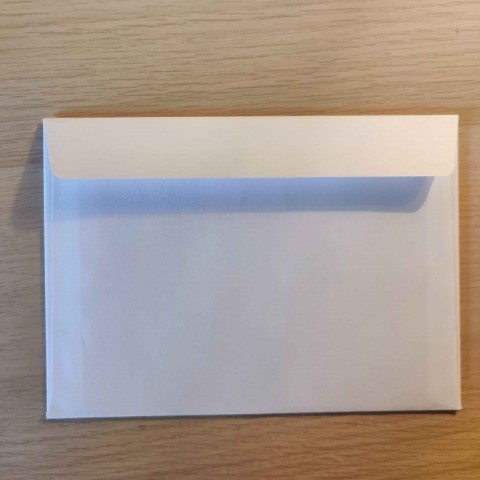
It’s good practice, generally, to write the address on the front of the envelope before you insert the letter, just to avoid weird pen marks where the envelope will be lumpy. But I am going to skip that step to show you how I seal letters.
After putting the card/insert inside the envelope, you should be left with a flap on the back. Most if not all envelopes will include a stripe for licking. Yes. Licking. Sorry if you think that’s gross, but the stripe of adhesive on the underside of the envelope flat is activated by wetness and I always lick the envelope (I might also just like the taste).
However, licking the envelope alone is not very secure—in fact, my letter-licking habit doesn’t do anything in most of the envelopes I send. The adhesive can be old, or applied too thin, or there simply might not be any. So you should never rely on it.
This is the time to get cute! I usually seal the center of the flap with a sticker, and then tape the sides with scotch tape. The corners are the most likely part of the envelope to open or tear, and I like to make sure they are secure.

BAM!! Now for the scary part!
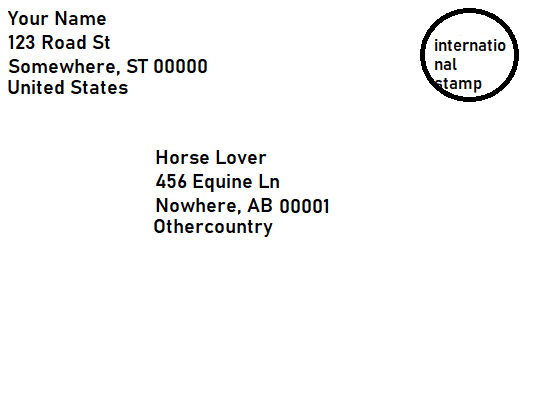
If you have a trade secured and the cards packed away, you should also have an address for the person you’re trading with. In the United States, addresses usually follow this format:

Your envelope should look like this: your name and address in the top left corner, the recipient in the center, and the stamp (we’re getting there) in the top right corner. Always use pen in black or blue or another dark color.
However, if there is an apartment number in the address, you can either include it after the street address or (more commonly) add another line for it.
You may also find that people are unwilling to give out their full name or even a name at all. That’s perfectly okay! People deserve their privacy, and it also doesn’t matter to the postal service. Technically, an address is all that is required on an envelope. However, when people do not give me a name, I usually write “Horse Lover” in place of the person’s name, just for fun.
Addresses for other countries follow different formats. If you are trading internationally, it’s best to follow the address the other person has given you exactly—after all, they know their country better than you do. It’s also important to have clear handwriting, and make sure to include any accents or foreign characters. You'll also have to include "United States" underneath your address in the top left corner.
Obviously, I can’t show you who I’m addressing this letter to (or my own address). Actually, this is a good time to mention:
The only person who should know the address of the person you’re trading with is you. If someone sends you your address (and you them), there is a reasonable expectation that that information will not be shared.
Additionally, if you do share this information publicly or with others, that is doxxing, which is illegal.
I have never had any issues trading with anyone in this community, and I trust those I give my address to. However, if you feel uncomfortable with the person on the other end for any reason, or if they are pressuring you for a trade, use that block button! And maybe also let the Facebook or Discord Bella Sara mods know.
Trades are fickle things decided upon by the individuals who enter into them. Only you and the other person can decide what is fair. You can back out of a trade at any point before giving out your address and mailing an envelope.
Which brings us to postage! Remember that first qualification? “The letter and all of its contents weigh less than or equal to 1 oz?” Yeah, we’re bringing that back.
Depending on how big your letter is and how many cards you’ve managed to fit inside it, you might want to weigh your envelope to see if it goes over the 1 oz limit. The envelope I’ve packed in this example (with 5 cards and two toploaders) does:
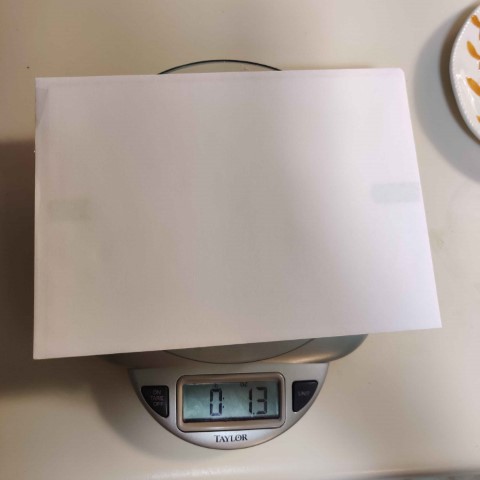
As you can see, I’m using a kitchen scale. I don’t actually weigh my letters unless I’m sending them internationally or I’m sending a lot more cards than normal. But this one weighs 1.3 ounces, which puts it over the 1 ounce limit for a forever stamp. So now we have to talk about stamp types!!
Stamp Types (Prices Accurate as of October 2025)
Forever Stamp ($0.78/stamp)
Additional Postage Stamp(s) (Prices vary)
They also sell “additional ounce” stamps, which just say that, and are worth the cost of an additional ounce, which is $0.29.
Non-Machinable Stamp ($1.27/stamp)
International Stamp ($1.70/stamp)
So putting a Forever stamp in the corner of my envelope pays for 1.0 ounce. The postal service doesn’t differentiate between the ounces; my letter is over 1 ounce and so I have to pay for 2 ounces. Each additional ounce is $0.28.
Depending on what you have available, you might just have to slap on another Forever stamp, but you’re technically losing money. I personally have lots of stamps in weird amounts, and so I’ll tack one of these on to make up the difference.
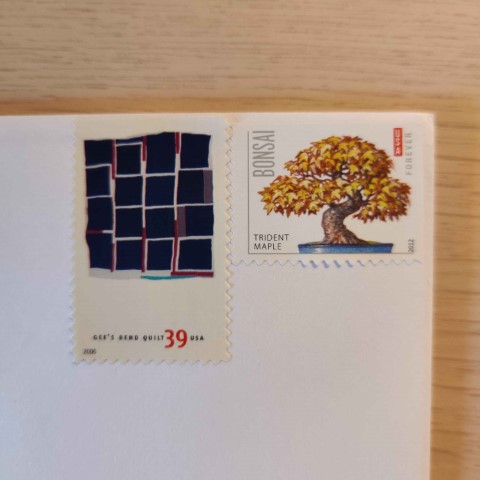
So this is what the top right corner of my envelope looks like. One forever stamp and one 39-cent stamp to make up for it going over an ounce! If even more stamps are needed, I work outwards towards the center of the letter, or work down.
Now, with letter packed and addressed and with postage attached, it’s time to mail your letter. You can do this three ways:
*If you don’t have any stamps, you can go into a Post Office and mail the envelope from the counter, paying only exactly what is needed (one stamp or whatever it comes to).


